Wednesday, April 3, 2024

Customize PDF Headers in Adobe InDesign: Step-by-Step Tutorial


Welcome to our comprehensive tutorial on how to tailor PDF headers using Adobe InDesign! Are you eager to refine your document's appearance or add a professional touch to your PDF files? Look no further! In this step-by-step guide, we'll walk you through the process of modifying PDF headers effortlessly using Adobe InDesign.


Whether you're a design enthusiast or a professional seeking to elevate your documents' aesthetics, this tutorial will equip you with the skills needed to create visually appealing and personalized PDF headers. No prior experience with Adobe InDesign? No problem! We'll guide you through each step, making the process seamless and enjoyable. Get ready to impress with your customized PDF headers! Let's dive in and unleash your creativity with Adobe InDesign.

Tuesday, April 2, 2024

Photoshop Tutorial: Adding Your Logo to an Umbrella Mockup


Welcome to our Photoshop tutorial where we'll guide you through the process of adding your logo to an umbrella mockup with ease! Whether you're a business owner looking to showcase your brand in a unique way or a designer seeking to impress clients with professional presentations, this tutorial is perfect for you. In this step-by-step guide, we'll demonstrate how to seamlessly integrate your logo onto an umbrella mockup, ensuring it looks natural and visually appealing. From selecting the right mockup to adjusting the lighting and shadows for a realistic effect, we'll cover everything you need to know to make your logo stand out. No prior Photoshop experience? No problem! Our tutorial is beginner-friendly and packed with helpful tips and tricks to help you navigate the software like a pro. By the end of this tutorial, you'll have the skills and confidence to customize umbrella mockups effortlessly, leaving a lasting impression on your audience. So, grab your logo and let's dive into the world of digital design. Subscribe now and join us on this creative journey as we turn ordinary umbrella mockups into extraordinary branding opportunities. Don't miss out – unlock the potential of your brand with our Photoshop tutorial today!

Friday, June 7, 2013

Thursday, November 22, 2007

Simple Animated Text CS3

-open Photoshop CS3'

DESIGNS


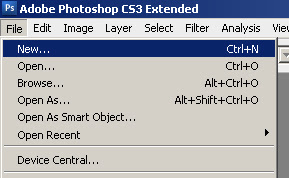
-File > Newphotoshop tutorials creating a new layer
-enter 460 width and 80 height, ok
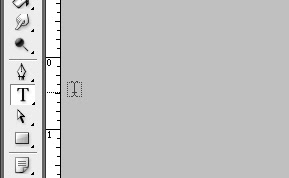
-click horizontal text tool
photoshop tutorials creating a new text using text tool-type anything you like on your workspace
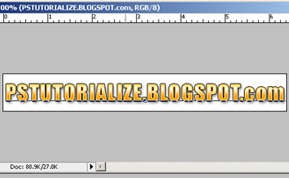
blending option animation and creating cool texttext tool typing a text on photoshop

-in my case i added some blending styles for the text...
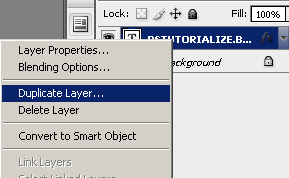
-duplicate text layerduplication of  layer in photohsop cs3
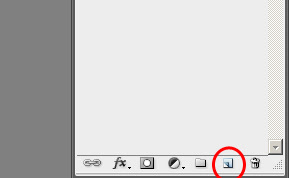
-create new layercreating new layer in photoshop cs3
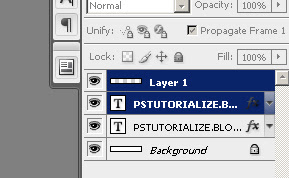
-select layer 1 and text copy below it and press ctrl+e to merge the two selected layersmerging 2 layers in photoshop cs3
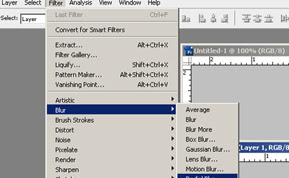
-after merge the highlighted layers now will be on layer one go to filter>blur>radialblurfilter rendering blur effet on photoshop
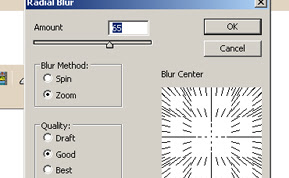
-enter this settingsphotoshop bluring effect pstutorialize.blogspot.com

ANIMATION


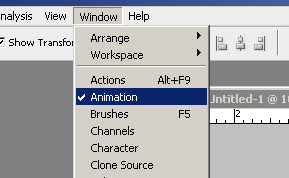
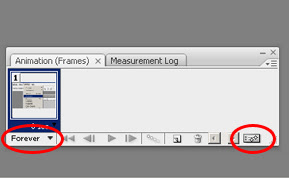
-to start the animation your animation layer tool must be open window>animationanimation window check pstutorialize.blogspot.com
-must have this settings on animation toolsettings on animation window check pstutorialize.blogspot.com
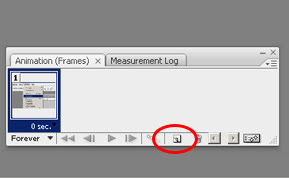
-create new layer
animation tool creating layer photoshop tutorials, pstutorialize.blogspot.com
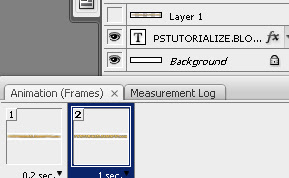
-at animation layer 2, layer 1 eye visibility must be off and has 1 sec. delay
animation to gif pstutorialize.blogspot.com

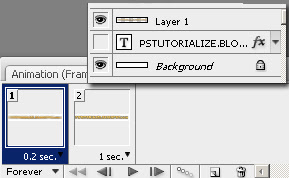
-at animation layer 1, text eye visibility must be off and has 0.2 sec. delay on animation toollayer visibility shows photoshop cs3 pstutorialize.blogspot.com
-when youre done animating go to file>save for web and devices..
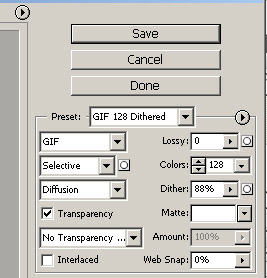
-have this settings and save
saving file to gif on adobe photoshop pstutorialize.blogspot.comI Have my Finish Product here..
i added more textlayers and blur to jave a cool looking animation
finish product of animation photoshop tutorials


Monday, November 19, 2007

Photoshop Keyboard Shortcuts


Zoom In & Zoom Out
  1. Control and "+" = Zoom in
  2. Control and "-" = Zoom out
  3. Control+0 = Fit to Screen
  4. Alt+Control+0 = Actual Pixels
  5. Control+Spacebar and clicking = Zooming in the part where we have clicked.
  6. Alt+Spacebar and clicking = Zooming out in the part where we have clicked.
You can also zoom in or zoom out either by entering the value in the percentage box or by moving the slider to the left or right. Alternatively, you can also click on two triangles. As the picture showing, clicking on smaller triangles will result in zoom out action. On the other hand, clicking on bigger two triangles will result in zoom in.
You can zoom upto 1600% in photoshop.
Copy and Paste
  1. Control+C = Copy
  2. Shift+Control+C = Copy mereged.
  3. Control+V = Paste
  4. Shift+Control+V = Paste Into (paste into the selection)
Color Filling & Color Swaping
  1. Alt+Backspace = Filling the selection with foreground color
  2. Ctrl+Backspace = Filling the selection with background color.
  3. X = Swaping foreground and background color.
Miscellaneous Shortcuts
  1. Control+' = Show gridlines.
  2. If you press control + ' again, it will hide gridlines.
  3. Control + : = Show/Hide Guides
  4. Control + R = Show/Hide Ruler
  5. Control + J = Duplicating the layer
  6. Control + T = Transform the layer
  7. Control + ] = Bringing the layer forward to the previous layer
  8. Control + [ = Sending the layer backward to the previous layer
  9. Shift +Control + ] = Bringing the layer forward
  10. Shift+Control+[ = Sending the layer backward
  11. Shift + click on layers will result in grouping of those layers. Pressing Shift and clicking on the layers again will result in ungrouping.
  12. Control + E = Merge all the grouped layers
  13. Control + F = Applying the last used filter.
  14. Alt + Control + F = Applying the last used filter with filter settings.
  15. Shift+Control+F = Fading the last used filter.
  16. When move tool selected, pressing the alt key and any of the arrow key will duplicated the active layer.
  17. When move tool selected, pressing any arrow key will move the layer one pixel depending upon which arrow key was pressed.
  18. When move tool selected, pressing shift+arrow key will move the active layer 10 pixels depending upon which arrow key was pressed.
  19. When typing with type tool, pressing Enter from alphabetic key pad will result in creating a new paragraph. Pressing Enter from numeric keypad will result in end of typing.

Saturday, November 17, 2007

color psychology

helps you build a website design/graphics on photoshop
with good color combination with this color psychology